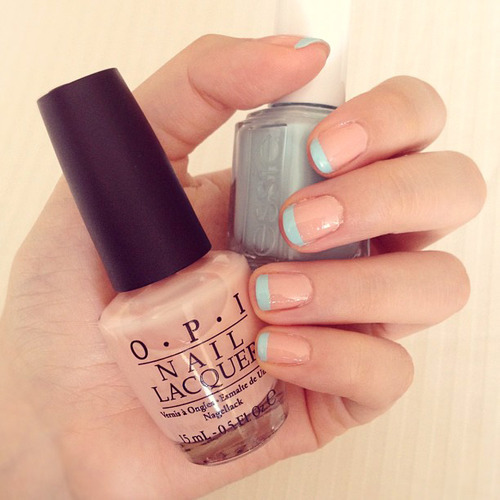
Nails of the Week: Mint French Tips

This week I decided to try a nail trend I’ve been admiring for a while: the classic French manicure, but with a colorful twist. I chose to keep the base color the classic nude, but instead of traditional white tips, I chose mint green. I’m really happy with the result – it’s simple, modern, and chic. Here’s how I achieved this look:
- Make sure your nails are perfectly clean and well groomed before you begin. This is an important first step before any manicure, but particularly when using a nude color, since any traces of dirt or previous polish color will show. When doing French tips, it’s also important to make sure all your nails are roughly the same shape.
- Using the base color of your choice (I used OPI’s Coney Island Cotton Candy), paint all your nails, using as many coats as you like. I did roughly 3 coats. Let this dry thoroughly before proceeding to the next step.
- Once dry, apply self-adhesive pre-cut nail painting guides on each nail (or, if you’re really brave, skip this step and do the tips free hand). Make sure all the nail painting guides are the same distance from the edge of your nail. You don’t want to have some thick French tips, and some thin.
- Using the tip color of your choice (I used Essie’s Mint Candy Apple), paint in the tips. If using nail guides, you don’t have to be particularly neat about it since once you peel them off, you’ll have clean lines (think painter’s tape). If you’re doing it free hand, however, go slowly and be very careful.
- Peel off the nail guides, and you’ve got perfect French tips!
- Apply a top coat to seal everything in. I use OPI’s Top Coat, it’s my favorite. This also fills in any gaps between the base layer and the tips, giving a smooth appearance.
And voilà, you’re done! Though time consuming (since you have to wait for the base to dry before doing the tips), this is a simple technique that yields really cute results. Plus, you can experiment with any color combination you like. Happy nail painting! x


