Tutorial: Easy Ombre Nails.
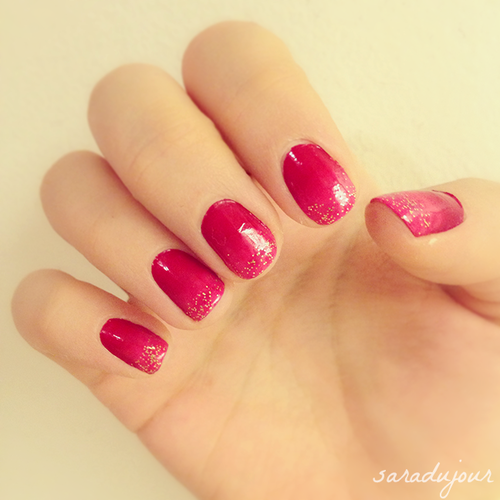
The ombre trend is everywhere nowadays. Hair, clothing, makeup – you name it. It’s even become a trend in nail art – one that looks impossible to replicate. If you’ve ever wondered how to do ombre nails, this is the post for you.
I’ve seen methods that use sponges, toothpicks, tape, and take hours to do because you have to wait for one coat of polish to dry before you continue. This method is the fastest, simplest way – no tools required. Just nail polish!
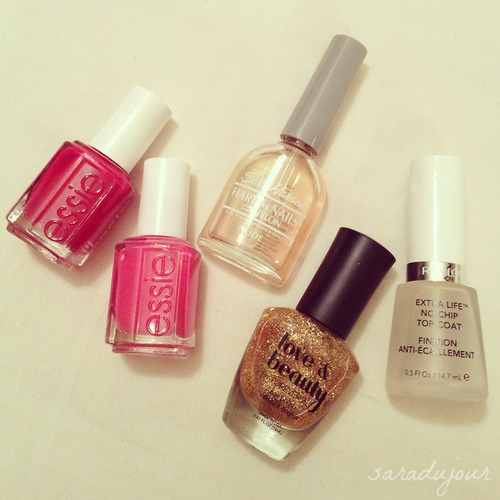
Any good recipe begins with ingredients, so here’s what you’ll need.
- 2 nail polishes, for the two colors you want blended on your nails.
- clear nail polish – I used Sally Hansen’s “Nude”. Make sure it isn’t a topcoat. They have different formulations, and that won’t work. Also, I recommend getting a cheap one, because you will sort of wreck it by getting some of the polish color into it.
- (optional) glitter nail polish – I used Love & Beauty’s gold glitter topcoat from Forever 21.
- (optional) top coat – it’ll make your manicure last longer, but isn’t essential.
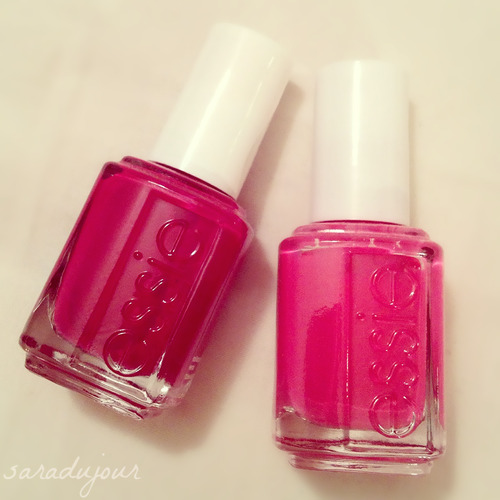
You can choose whichever two colors you like, from opposite colors to similar ones. I chose Essie’s Plumberry (left) and Essie’s Fiesta (right). Plumberry is just a few shades darker than Fiesta, but they’re very similar. I wanted to do a more subtle ombre look, but that’s just personal preference!
As with any manicure, make sure you start with clean, unpolished nails. Start with your first color, and dab a few drops at the base of your nails. It’s going to get messy and get on your skin – that’s okay, we’ll deal with that later. Paint your nails halfway with that color, then take the second color and paint the top half. In the middle, where the colors meet, you’re going to take a drop of the clear polish and dab it, blending the two colors together. When you’re happy with the gradation, stop and do the next nail. You have to work quickly and blend the colors before the polish dries, so you do have to do this one nail at a time.
At this point, you’re going to have nails that look something along the lines of this hot mess:
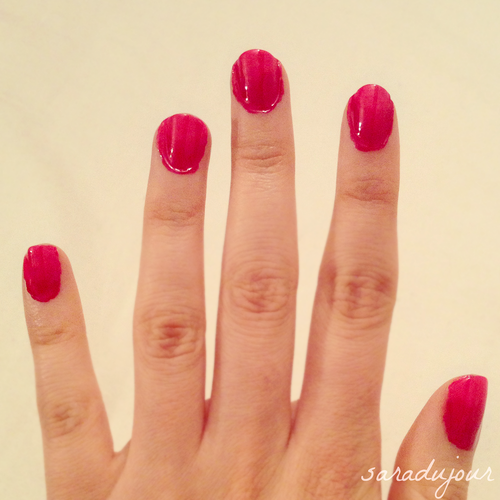
Yup, she’s a beaut. You can stop here, and just add a topcoat, or you can wait a few minutes and add the glitter polish on the tips, like I did. If you’re really fancy, you can dip a small brush in nail polish remover, and take the polish off your cuticles and skin, but as for me, I just let it dry completely overnight.
The next morning, I immerse my fingers in warm water for a few minutes (I do this in the bath, but it would work just the same in a bowl of water), and once the skin gets soft enough, it’s easy to peel the polish right off your skin. And you’re left with perfect ombre nails!
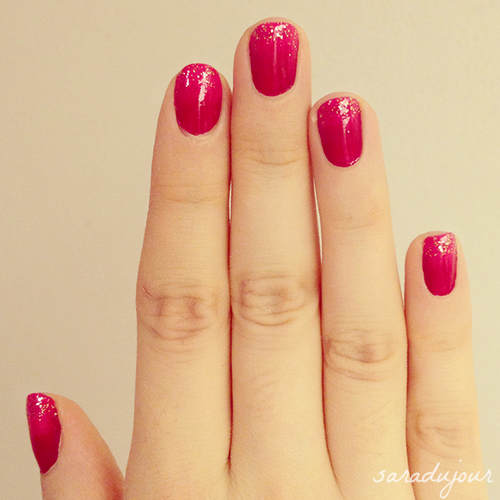
Ta-da! And here’s a close-up:
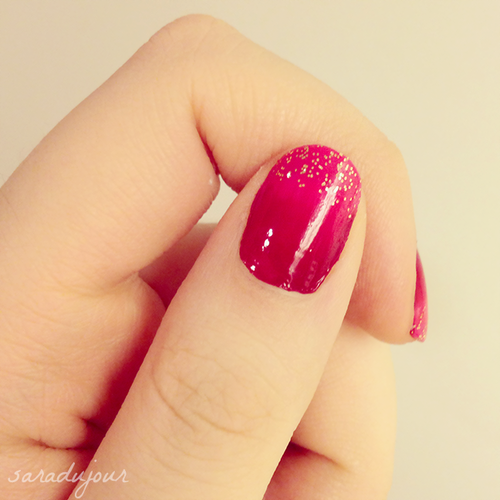
I hope you found this tutorial useful. I would have taken more “in progress” photos, but because you have to work quickly to blend, that just wasn’t possible. In total, this manicure took me no more than 20 minutes.
Let me know if you end up trying this method, and show me how it turns out by tagging @Saradujour on twitter or instagram! x


