Tutorial: My Everyday Soft Cat Eye
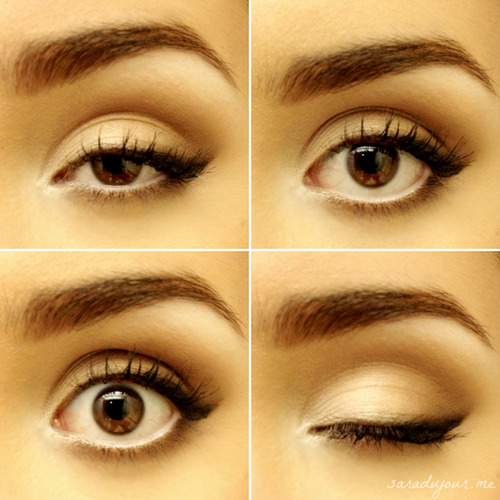
I’ve gotten a ton of requests to do a tutorial on my everyday eye makeup, so here we go! This soft, slightly smokey cat eye is the eye makeup I do pretty much every day (though sometimes I skip a few steps to save time), both for daytime and evening.
I find this style of eye makeup most flattering, because it isn’t too obvious but makes your eyes look bigger and more awake, and your lashes fuller.
It may seem like a lot of steps at first, but once you get the hang of it, you can bang this out in under five minutes.
Here’s what you’ll need:
[show_shopthepost_widget id=”331620″]
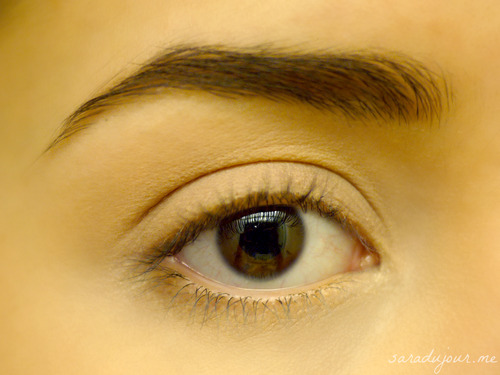
1. Start with a clean, primed eye. I do my eye makeup after I’ve done my foundation and concealer, so that’s already applied here. My favorite eye primer is MAC’s Paint Pot, in the color Painterly, because it perfectly matches my skin tone and makes my eyeshadow last all day, and even overnight!
Apply the primer on your eye lid all the way to your brow.
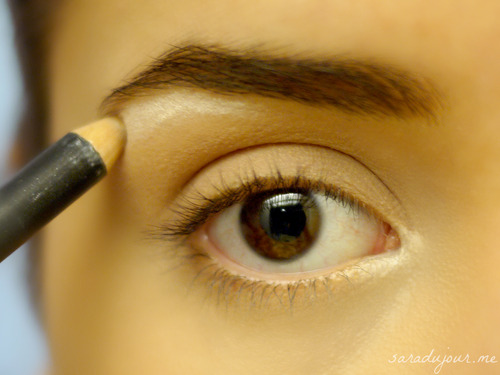
2. Using a matte white eyeliner, draw a line on your brow bone, under the arch of your brow extending outwards, and on the inner part of your eye. This is going to highlight and brighten your eye. My eyeliner of choice is MAC’s Fascinating Eye Kohl.
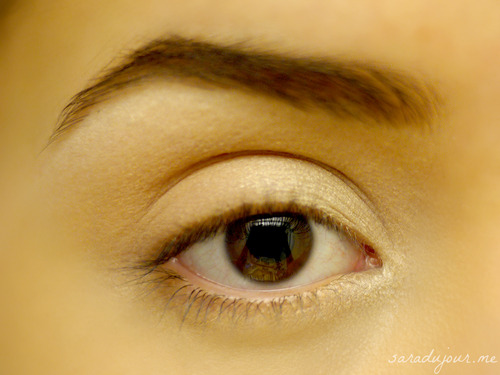
3. Blend that out using your fingertips, and apply a light champagne eyeshadow over it, and on the inner 1/2 of your eyelid. You can use a matte shadow or one with a bit of shimmer to it – I’ve done it both ways and both look lovely. Here, I’m using MAC’s Nylon eye shadow.
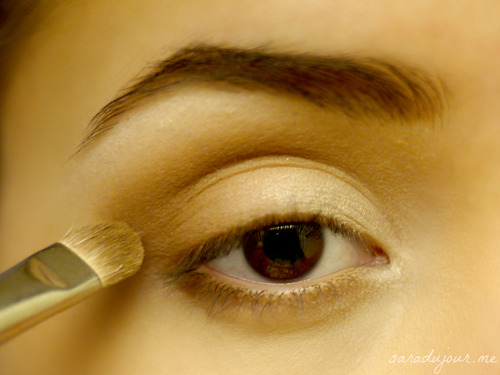
4. Contour! Using a matte medium brown shadow (or a shadow two shades darker than your skin tone), shade your crease and the outer corners of your eyes. Also, add a thin line beneath your lower lashes. Make sure you blend all the edges really well, it should look soft and almost invisible – no hard lines! I’m using MAC’s Cork eye shadow.
This defines your eyes, accentuates their shape, and helps them look bigger.
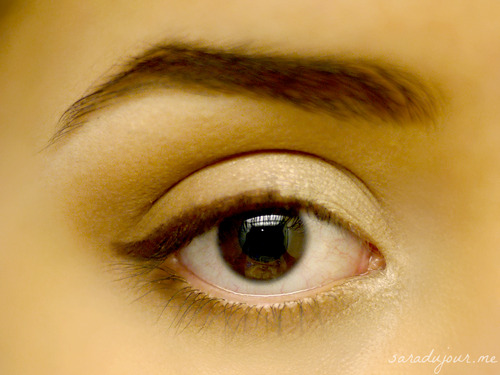
5. Using a dark brown pencil eyeliner, draw a cat eye flick starting from the inner 1/2 (or so) of your eye going outwards. This helps to add some lift to your eyes, which makes you look more alert and awake.
Also line your upper waterline, which gives the illusion of fuller lashes. I’m using Stila’s Smudge Stick Waterproof Eye Liner in Lionfish.
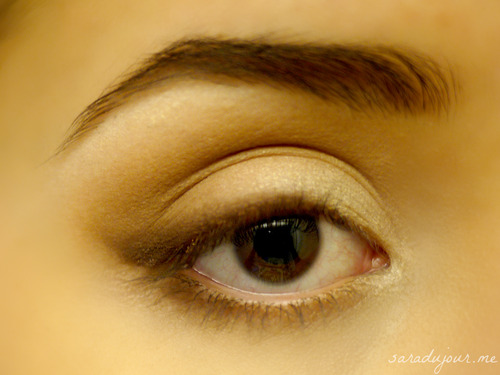
6. Using a dark brown matte eye shadow, blend and soften the eyeliner. Push the shadow over top of the pencil liner, against the base of your upper lashes. This helps make your lashes look full and lush!
I’m using a shadow that came in a Maybelline compact. It doesn’t have it’s own name, but the quad is called Chai Latte.
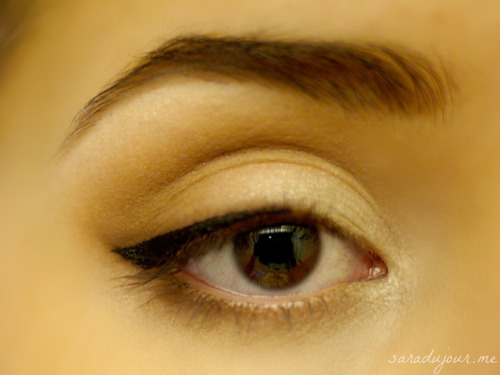
7. Using a black liquid liner, draw a thin line against your upper lashes, flicking it outwards in a cat eye shape. Some days I skip this step and go straight to mascara, but adding the black liquid liner helps make your lashes look even more full and thick. I’m using Stila’s Stay All Day Waterproof Liquid Eye Liner.
Doing the pencil liner flick first sets up the shape for you, so you don’t have to worry about making uneven lines with the liquid liner.
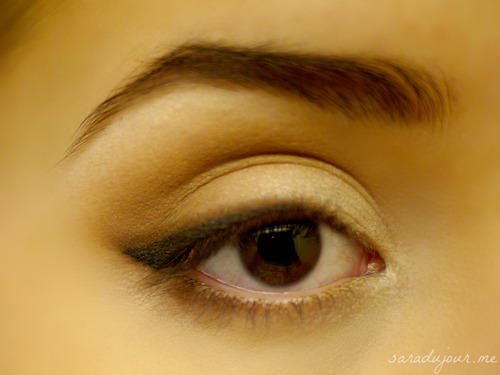
8. Soften the liquid liner by pressing the same matte dark brown shadow over top of it, blending the edges. This isn’t a defined cat eye look, but instead, a soft, hazy effect.
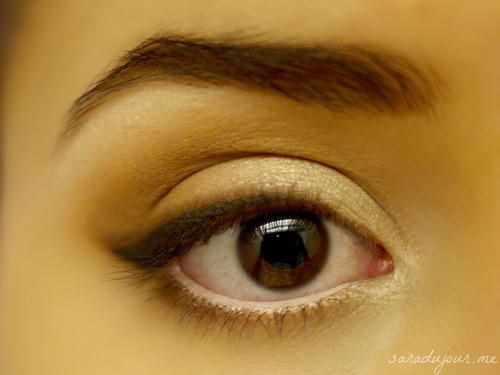
9. Using the same matte white pencil eyeliner, line your bottom waterline. My eyes are sensitive and get a bit red when I do my eye makeup, but in a few minutes that goes away and I look less like a zombie.
This white eyeliner trick makes your eyes look bigger and brighter, and was a favorite of Marilyn Monroe’s!
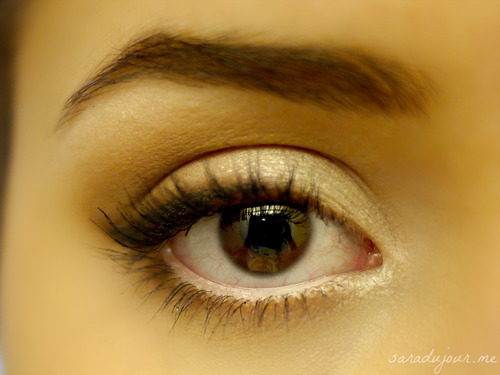
10. Curl your lashes and apply black mascara both on your upper and lower lashes. My favorite mascara is Maybelline’s The Falsies Flared, in their waterproof formula, and “blackest black” color.
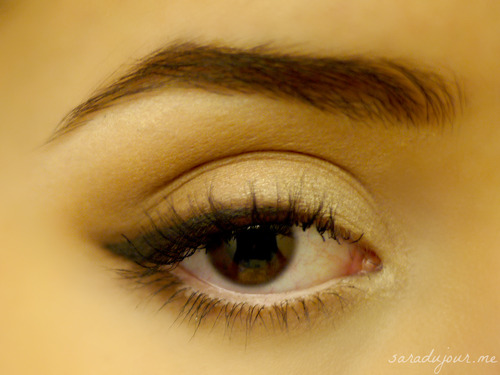
Ta-da, you’re all done! Leave a comment if you found this tutorial helpful, and would like more in the future! :) x


Pingback: Everyday Easy Soft Cat Eye Makeup Tutorial()
Pingback: Snow White Halloween Costume • Sara du Jour()